Insert Line Arrows & Block Arrows In Word
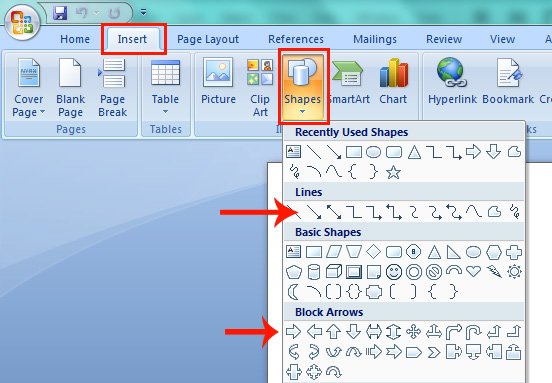
You can insert line and block arrows in any direction e.g. Up, Down, Right or Left etc. Follow the steps below;
- Open Microsoft Word (I have Used Word 2007 in this tutorial)
- Click Insert Tab
- In Illustrations section click Shapes (see the image tutorial below)
- From the Dropdown Menu click the type of Arrow you want to create in your document
- Press left Click and drag your mouse according to the width and height of your desired arrow
- Release Mouse Click
- See The Image below if you need more help
Was This Helpful?
Please click the Stars below and tell us how helpful was this Word Tutorial for you.
Related Tutorials
- How to draw a Vertical Line in Word?
- How to Insert Subscript and Superscript in Word?
- How to Change Page Color in Microsoft Word?

Leave A Comment