Steps To Upload Files On Website With CuteFTP
To upload your files on a web server using CuteFTP you need to obtain the following information from your web host.
- Host Address: e.g. ftp.example.com
- UserName: e.g. PlainTips.com
- Password: e.g. xxxxxxxxxxx
Once you have this information, open the CuteFTP software and fill these required fields as shown in the snapshot below;
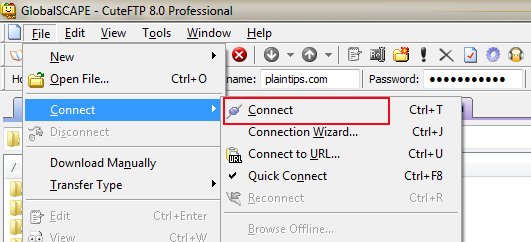
The next step after filling this information, you need to connect CuteFTP with your web hosting server. Simply click the “File” Menu, Click “Connect” and again click“Connect” in the sub menu. See the image below;
Great!!!
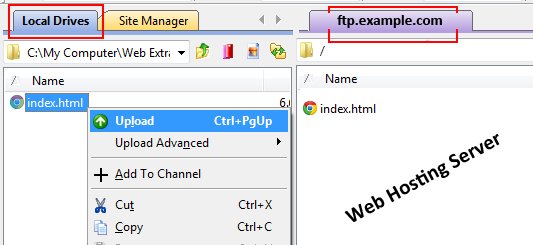
You are almost done. The next step is to upload your files from you local drive to the web server. Navigate to the file you want to upload, right click the file and click “Upload”. See the image below for details;
As soon as CuteFTP finishes the file upload process, the uploaded file (index.html in this case) will appear in the web hosting server panel of the software. Moreover you will also see a “Directory Listing Completed” message in the status bar.
CONGRATULATIONS!
You Have Successfully Uploaded Your Files on Your Website. Now open a Web browser and visit your site’s URL to see your pages on the web. Rate This Post By Clicking The stars Below.
Related Links


Leave A Comment