 A Watermark is a ghosted Text or Image that appears behind the main content of the page. Usually it is used to indicate the reader that what kind of document is it and how it should be treated. The most commonly used terms as a Watermark in a Word Document are: CONFIDENTIAL, SAMPLE, DRAFT & DO NOT COPY etc. It is very simple to insert a Watermark in an existing or a new text document. See the snapshot and steps below.
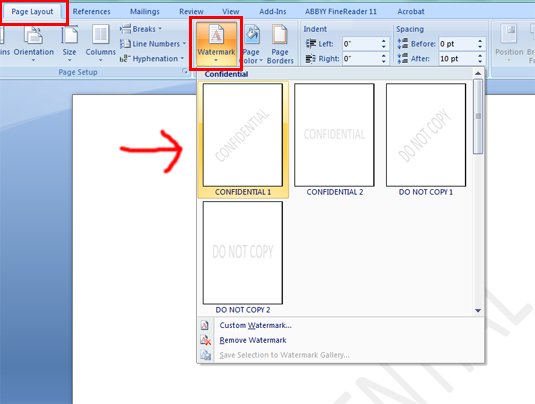
The image tutorial shown above is using “CONFIDENTIAL” as Watermark in it.
Step by Step Instructions to Add Watermark
- Open The Word Document You Want to Add A Watermark To
- Click the “Page Layout” tab
- Go to “Page Background” Section
- Click “Watermark” Dropdown Menu (as shown in the above image)
- Choose one of the Pre-Made Watermarks that fits your need
Add A Custom Watermark (Text or Image)
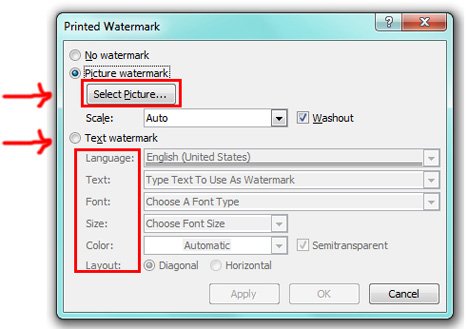
In addition to Pre-Made Watermarks, Microsoft Word gives you the flexibility to use custom watermarks e.g. Personalized Text and Images. If that is what you want, Click “Custom Watermark” in the dropdown menu (The last step shown above). Resultantly you’ll see “Printed Watermark” a self explainatory pop-up menu. see the image shown below for details.
Related Links
Leave A Comment