 Your computer system needs to be maintained in order to deliver the best performance. The most important tasks to keep your PC running faster include cleaning up spyware, cleaning up the registry, privacy sweep and cleaning the junk files. This article explains how to clean junk files (files that are no longer needed and are unnecessarily occupying your precious system memory).
It is very difficult to manually find and delete all the junk files as they are located on various locations of your hard drive. However, there are a couple of tools that make it easier for you to safely get rid of this clutter. In this tutorial I’ll show you 2 most widely used tools to eliminate junk files. The first tool is Windows Disk Cleanup utility and the other is TuneUp Disk Cleaner (a component of TuneUp Utilities for advanced system care).
Windows Disk Cleanup Utility
As the name suggests, Windows Disk cleanup is a built-in feature of Microsoft Windows. This tool is designed to search and analyze your computer’s hard drive for files that are no longer needed. Disk Cleanup targets many different types of files when it performs the initial analysis and then shows the description of every file type along with an option to keep or delete them. The following step-by-step tutorial explains the disk cleanup process in more detail. The snapshots used in this tutorial are taken from a computer running Windows 7.
Steps To Delete Junk Files

1. Click the Windows button and type “Disk cleanup”.
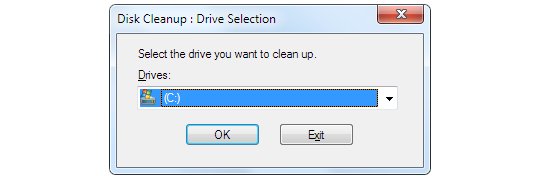
2. Open the program and select the drive you want to clean up. For this tutorial I have chosen drive C: now click “OK” to continue.
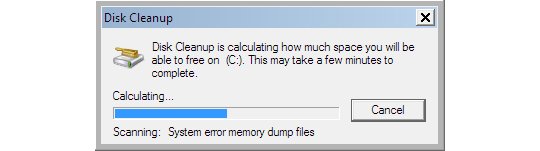
3. Disk cleanup analyzes and calculates that how much disk space you’ll be able to free up.
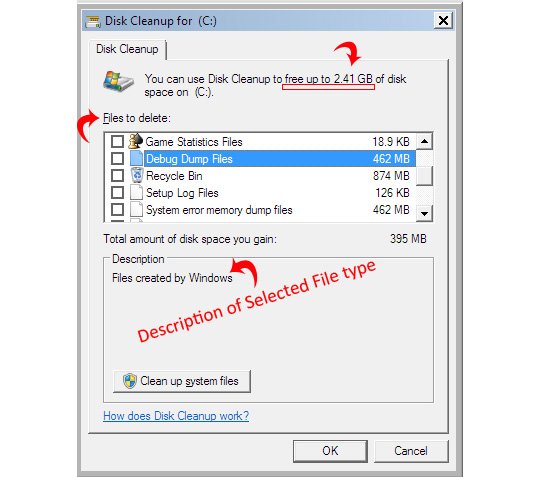
4. This snapshot (in my case) shows that it is possible to free up 2.41 GB of space using Windows Disk Cleanup utility. The types of unwanted files along with the description is also visible in this image. Click each file type to learn more about the specific details of chosen category. This snapshot was taken when I clicked the “Debug Dump Files”.
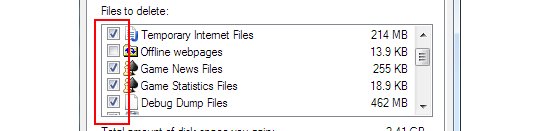
5. Tick mark all the file categories that you want to delete and click “OK”.

6. The system finally asks for your permission to permanently delete the chosen file types. Click “Delete Files” button to clean junk files from your computer.
Further Readings
Leave A Comment